Introduction
In this tutorial, we are going to learn how to interface an Ultrasonic sensor to an Arduino UNO. And we will learn how to measure distance using Ultrasonic sensor.
Theory
The main purpose of an Ultrasonic Sensor is to measure the distance of an object that coming inside it’s front or near. We are going to connect the Ultrasonic Sensor with an Arduino UNO.
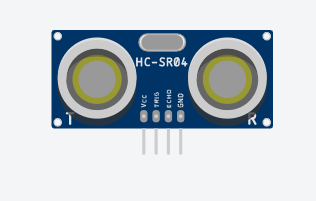
In an Ultrasonic Sensor there is mainly two parts. First one is Transmitter (that sends the signal) and another one is Receiver ( that receives the signal after hitting the signal with an object).
When a pulse of at least 10 microseconds (10 µS) in duration is applied to the Trigger pin. From this the sensor starts working .By which the sensor transmits a sonic burst of eight pulses at 40 KHz. When the eight pulses travels through air, the Echo pin goes HIGH to start forming the beginning of the echo-back signal.
Requirements
| Parts | Quantity | Links |
|---|---|---|
| Arduino UNO | 1 | https://amzn.to/2TvSOxY |
| A-B cable | 1 | |
| Ultrasonic Sensor | 1 | https://amzn.to/3p0QRbp |
| Bread Board | 1 | https://amzn.to/3mxYVON |
| Connecting Wires | As per required | https://amzn.to/2TtqeNx |
TABLE
Circuit Diagram

Program
For programming this concept we need to understand some basic syntax of Arduino IDE. The first thing is we need to install Arduino . After that we need to know how to interface led to Arduino.
For control Ultrasonic Sensor we need to declare Ultrasonic Sensor as a input.
pinMode(PIN Number, Device TYPE);
PIN Number– The pin, in which we have connected the device. In this case, I have attached sensor’s two pins to 2 and 3 no pin of Arduino UNO.
Device Type– What is the device type. Like, For output devices we need to declare the type as OUTPUT and for input devices, we need to declare as INPUT. In this case, we have connected HC-05 Sensor.
As we know the Sensor having two pins for OUTPUT and INPUT purposes. Trigger pin is used as OUTPUT and Echo pin is used as INPUT.
pinMode(trigPin,OUTPUT);
pinMode(echoPin,INPUT);
After all declaration we have to go for digitalWrite() function.
digitalWrite(PIN Number, Status)
PIN Number– in which pin we have connected the device. In this case i have attached to 2 and 3 no pin of Arduino UNO.
Status– status means we need to turn the led on/off. For turning led on we can write HIGH or 1 and for turning off led we can write LOW or 0.
Code
// Here i have initially declared echopin and trigpin connected to 2 and 3 no pin.
#define echoPin 2
#define trigPin 3

long duration; //Declaration
int distance;


void setup()
{
 Serial.begin(9600); // For serial monitor initialization
  pinMode(trigPin,OUTPUT); // Trigger pin as output
  pinMode(echoPin,INPUT); // Echo pin as input
}

void loop()
{
  digitalWrite(trigPin,LOW); //Intially off
  delayMicroseconds(2); //Delay of 2 ms
  digitalWrite(trigPin,HIGH); //Trigpin sends data
  delayMicroseconds(10); //Delay of 10 ms
  digitalWrite(trigPin,LOW);

  // Formula for calculate the distance
  duration=pulseIn(echoPin,HIGH); //Echopin receives data
  distance=(duration*0.034/2);

  Serial.print("Distance : ");
  Serial.print(distance);
  Serial.println(" cm ");
  delay(1000);
}